Pages

                                                     
Showing posts with label dslr camera. Show all posts

Thursday, February 14, 2013

Tips on Buying Used Lens

 
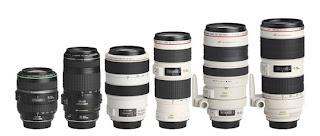
Tips on Buying Used Lens - After you read guide to buy a DSLR camera lenses on this post and this post, one time you need a lens, but the financial situation is not enough to buy a new lens, so the solution is you have to look for second hand lenses. Excess buy second-hand lens is the price is cheaper than a new lens, but you should be careful before buying, so that your savings are not worth it.


Here are tips before you buy a second-hand lens:
  1. Determine the required camera facility, type and brand of lenses that fit within the desired range of the available budget. To get an idea of price ranges, contact some camera stores over the phone.

  2. Go to store lens, try a new lens, watch AF ring and zoom ring. some lenses rotate AF ring as it searches for its focus, this will affect the use of circular polarize filter (CPL). As you understand the conditions of the new lens, you will be expected to get a reference of comparison to the used lens.

  3. Make sure you try first lens you want to buy. Make sure the autofocus-motor works smoothly (if the lens autofocus)

  4. Check also part of the lens, do not get any scratches, dewy, or fungi.

  5. Note the bolt on the outside and inside of the lens, if the bolt is not good, it means that the lens has been opened before.

  6. For conditions inside the lens, bring a small flashlight to see it, either from the front or from the rear, notice the dust on the inside of the lens, if it can be tolerated or not.

  7. Try to put the lens on the camera for checking the DOF (depth of field), use a sheet of newspaper, put the paper on a flat surface, take the photo paper at an angle of about 40 degrees. focus on one word, e.g. the word "lens-kit", see the results, if the word "lens-kit" clearer than the surrounding words, means the lens is still in good condition, but these pictures could show the wrong focus sharp if not the word "lens-kit" is. This checking is very useful especially for a lens with a large aperture specifications, such as f/2.8 aperture or below, and make sure all lenses functions running properly.

  8. Check that the lens aperture setting close fit in the shooting. Go to the back of the camera, set in Bulb mode, and press the shutter. Perform this test on the entire range of the lens aperture.

  9. Avoid lens with a zoom or focusing mechanism falters, too hard, or too loose.

  10. Inspect the filter thread on the front of the lens, and make sure there is no damage or jam. When in doubt, do a test by installing a filter on the lens.

  11. Avoid buying lenses online from an individual seller you do not know very well, because it's been a lot of fraud. Also avoid to transfer a down payment or pay in full with the promise of the lens will be shipped the same day, except to an online thrift shop that you know well.

  12. Also make sure you receive a receipt from the seller for warranty claims, if any, and also to make sure that the lens you buy is not illegal.

Tuesday, February 12, 2013

Consider Before Buying Digital SLR Camera Part 2

 
Consider Before Buying Digital SLR Camera Part 2 - After you read non-technical considerations before buying a DSLR camera on previous post, now I try to discuss technical considerations. Considerations in choosing a DSLR camera can be very different from the pick pocket camera. This difference is caused among others by:

1. DSLR is a system that can be customized according the specific needs of the owner, is very different from a pocket camera that is all in.

2. The difference in lens technology, sensors, image processors and operating the buttons on each camera, which in turn distinguishing character results.

3. Almost all compact cameras use CCD sensor size 1/2.5" Sony products, while the DSLR has plenty of options other than CCD technology, such as:


  • Canon-developed CMOS (and later also used by Nikon)
  • NMOS used by Olympus
It also has sensors with different physical sizes, namely:
  • Full-frame, used for high-end camera Pro
  • APS-C, used in camera entry level and semi-pro
  • 4/3, used by Olympus and Panasonic.
4. Availability accessories & supplies in addition to body & lens.

The availability of equipment and accessories can be an important consideration. Buying a DSLR is basically buying a system. Once you buy it, the system will 'lock' you always use supplies and accessories that are compatible with.


In this case, I think Canon and Nikon have the advantage because - as an old player who leads the market - is a lot of 3rd party accessories available on the market, for example:
  • Lens: Sigma, Tamron, Tokina
  • Flash: Nissin, Metz
  • Battery grip: different types of brands.
Certainly in terms of accessories, the lens becomes a major consideration (learn before buying lens here and here). And it does not mean other brand cameras, in addition to Canon and Nikon, have no excess. Some of the advantages to be noted are:
  • Sony can use the Carl-Zeiss and Minolta lens.
  • Olympus has an advantage in dynamic range and color saturation in addition to innovative technologies.
  • Pentax can use the many old lenses that have been proven sharpness & quality.
However, if you want to pursue photography, you should pay attention to the system, buy a DSLR camera is to buy a system. Especially if you are experienced and have the equipment to one brand. The benchmarks that you should consider are:
  • Technology will continue to evolve. Today's sophisticated body, in a few years will be out of date.
  • The lens has a longer lifespan than the body.
  • Ability to operate a photographer, sensitivity of capturing moments and technical ability are more important than the pursuit of technological development.

Thursday, January 31, 2013

DSLR Lens Buying Guide - Part 2

 
DSLR Lens Buying Guide Part 2 is the next clues before you buy dslr lenses. Unlike if you have a pocket or a prosumer camera, where the lens can not be changed, the owner of DSLR camera lens requires precision in choosing to be purchased, as each type of lenses designed specifically for a particular shoot. But DSLR camera manufacturers anticipate the needs scene by attaching the kit lens that is a lens vario, which is designed to meet the initial needs of the buyer or user to a certain extent because the lens kit is economical to reduce the price of DSLR camera package offered to the market.

After a lot of shooting with the default kit lens camera the photographer will definitely feel the lack of such a kit lens, so that he would decide to buy a new and better lenses. The question is "what kind of lens you should buy?" For photographing macro would be better results if you use a macro lens, photographing landscape will be better results if you use a wide-angle with fixed-aperture. Similarly, macro photograph will not be good results if you use a wide angle lens.

To be emphasized here is no need to buy all types of lenses. Select the lens that best suits your photography needs the most preferred and most frequently performed.


To be able to decide what type of lens to buy, do some research as follows:
  1. Take photos with the kit lens as often as possible with good planning.
  2. Periodically, inventorying your photo collection and create a classification that found photography categories most frequently performed.
  3. Detailed diagnostic photographs of most categories and determine the necessary repairs of the lens, for example:
  • less sharp focus
  • less blur bokeh
  • less precise tonal
  • less rapid response, etc..
Job demands


An understanding of this photo category, allowing us to determine the criteria of the lens that we need, for example:
  • Paparazzi and sports journalists often take photos from a distance and speed of response necessary in order not to miss the moment, so need a telephoto lens with a focal distance (over 200 mm) equipped with an image stabilizer and ultrasonic motors.
  • Photo studio with lighting products in a limited, need a lens with a shorter focal length (between 18 and 50 mm), can shoot from close range (macro) and wide aperture.
  • Photo stage / show requires a lens capable of shooting in low-light conditions (wide aperture / fast lens), fast response (ultrasonic motor or the like), and long focus (200 mm or more).
  • For photojournalism, travel, human interest, what is needed is flexibility and foresight to capture the moment. Vario lens with wide range and light weight is the best suited to meet these needs, e.g. 18-135 mm or 18-200 mm.
After knowing the criteria lenses we need, then we can look for a lens that suits needs and budget.

Saturday, January 26, 2013

Pocket or DSLR?

 
Pocket or DSLR - There are two major groups of different types of digital cameras: Pocket and DSLR.
  1. Compact camera (commonly called pocket camera), is a compact system and has integrated, has a whole section full of a digital camera.
  2. DSLR camera, is a camera system that consists of two major subsystems, namely:
  • mechanical-electronic subsystems (body), and
  • mechanical-optical subsystem (lens)
Pocket or DSLR.jpg

Main Difference

The most obvious difference between the two categories is the ability of DSLR camera to replace the lens that will be used in accordance with the needs of photographers. In addition the issue of this lens, there are significant differences, but not visible, the difference in sensor size:

  • Compact digital cameras usually have a smaller sensor size 1/2.5 inch to 1/1.6 inches.
  • DSLR cameras have the larger sensor size, which is 22.2 x 14.8 mm (APS-C) or 35x24 mm (full frame).
  • The development of sensor technology enables Olympus to develop smaller size (4/3 inch) than the APS-C DSLR cameras for her which was followed by Panasonic cameras with micro-4/3.
The difference in sensor size has an impact on the ability of a camera captures the light. The most obvious differences in results due to the influence of the size of the sensor can be seen from the level of noise in the photos using a high ISO (> ISO 200). The camera with a small sensor size would produce more noise at high ISO.

Though somehow, there are still advantages of pocket camera with small sensor, namely:

  • Its compact size
  • Light weight
  • ease of use
  • A more affordable price
What about picture quality and sharpness?

Apparently, the shooting conditions in the outdoor and sunny weather, it is almost impossible to distinguish the results from a compact camera or DSLR. More surprising yet, the images that we see on camera affected barely used. Ken Rockwell article below can serve as a reference:Your Camera Doesn't Matter and A $25 vs. a $5,000 Camera

In fact, production and market demand for compact camera / pocket remains larger than a DSLR camera.

Friday, January 25, 2013

How to Customize White Balance DSLR Camera

 
How to Customize White Balance DSLR Camera - This question will arise if we would shoot with complex lighting. Is the photographer able to overcome this? This post is a continuation of the post White Balance in Photography.

Some cameras, especially SLR and prosumer, provides manual white balance setting. Manual settings are the most accurate if we are confused by our light source color temperature. This usually occurs in a photo shoot with a more complex light sources (more than one type of color temperature). So the custom White Balance is the right way to solve this complex lighting.


Customize White Balance DSLR Camera 1.jpg

Here's how to customize white balance correctly:
  • Look for the white paper, white shirt, white walls, or any other with white color. If the white stuff is not available, you can use the gray matter.
  • Place the paper or something white / gray so that lighted by the complex light where you will be photographing. Position the camera so that the paper fills the entire frame photos. (see picture above)
  • Set White Balance in custom or manual mode, set the focus in manual focus position, then take a metering. Keep impartial exposure (not under but not over-exposure). Then photograph paper or object. The camera will detect the white and store the temperature, confirmation will appear on the camera's LCD screen when the settings are OK.
  • The next step is to put a picture as the standard for white balance setting:
Customize White Balance DSLR Camera 2.jpg
1. Canon camera settings (Canon 60D):
  • Press the Menu button, use the Main Dial to lead to the Shooting Menu tab. Highlight Custom White Balance, and then press Set.
  • Use the Quick Control Dial, highlight the photo you just took, press Set and then Ok.
2. Nikon camera settings (Nikon D3100): 
  • Search White Balance menu. Select the Preset Manual.
  • Select the Use Photo. It would appear that you have a recent photo taken. Select Image Select, then Ok.
An easier way is to use an accurate and additional accessories called expodisc or kenko, prices range from US$80 to US$150.

Thursday, January 24, 2013

White Balance in Photography

 
White balance in Photography - is a crucial aspect in the world of photography and the effect on the final image. The camera is actually not really recognize colors. Displayed by the camera is how different frequencies of light reflected from an object to a different frequency of light that becomes the standard of comparison. An understanding of the process of color reproduction is very important in photography that require a high level of color accuracy, for example in product photos, fabric color, light graphics, etc..

Auto White Balance

Color 'white' was chosen as the standard comparator because it is a neutral color. In the full-frequency lighting conditions, the white color will reflect all light frequencies, so the white object is an object that reflects light with the highest intensity. But because it is a neutral, white would be red when illuminated by a red light, it looks blue in the light blue, and so on. Under these conditions, the Auto White Balance on the camera set up to recognize 'the reflection of the object with the highest intensity' and use it as a standard color 'white' to do color correction.

As a result, in certain conditions, the camera can reproduce wrong colors because there is no white object on the object captured. In this condition the required precision of the photographer to help the camera do color correction, but not in sunset/sunrise photography for example.

White Balance 1.jpg
(Photo source: www.hootphotography.com)
White Balance Setting

Each camera has a different way of setting, so you should refer to the manual if it has not so far found a way. If you are still confused, use the auto white balance mode. The camera may not always be right, but at least more true.

Here are presets that are normally available on any compact cameras:


White Balance 3.jpg
  • Auto - the camera will guess the color temperature based program planted by the camera manufacturer. You can use it in most situations, but not in every situation. So try to explore to the more tricky lights.
  • Daylight / Sunny - usually with the symbol of the sun, use while in the sun. Not all cameras have this white balance preset, because it is almost the same as the normal White Balance.
  • Cloudy - symbolized by the cloud, use when shooting in cloudy weather. Usually this presets will generally give a touch more 'warm' than Daylight preset.
  • Shade - usually a house or a tree symbol, use when shooting indoors (during the day) or you are in the shadows - not direct sunlight. The light is in shadow (shade) is generally cooler (blue) compared to shooting under direct sunlight, so the settings are a little warm.
  • Tungsten/Incadescent - symbolized by the icon of the bulb. Because it is suitable for use when you are shooting indoors with tungsten light sources / incadescent like bulb. In general, these presets will cool color photos.
  • Fluorescent - symbolized by the iconic neon lights, use when shooting indoors with fluorescent lighting. In general, these presets will warm color photos.
  • Flash - symbols flash, if you use the flash (strobe), use this preset. The light generated by a camera flash can be quite 'cool', so this arrangement will warm colors on the photo.
  • Custom - This will be discussed in the next post.
White Balance 4.jpg

A summary of the description you can see above table.

Kelvin White Balance

Kelvin White Balance usually found on professional DSLR cameras. Basically, preset white balance are based on a temperature difference of each color of light. At Kelvin White Balance presets determined from an understanding of physics that objects with a certain temperature will emit light with a certain frequency as well. Solar light emitted by an object with a temperature of 5500K. Fluorescent light has a temperature of 4000K, 3000K incandescent lamp.
 

White Balance 2.jpg
(Photo source: www.berkelphoto.com)

Error in degrees Kelvin settings will produce the wrong color. The benchmarks are:
  • If the images produced bluer mean temperature setting is too low.
  • If the images produced yellowish, then setting the temperature too high.

Thursday, January 10, 2013

Tips for Beginner Photographer

 
Tips for Beginner Photographer - This post is suitable for novices in the world of photography
 
Beginner Photographer 3.jpg

1. Do not be hurried buy expensive photography equipments
My experience says, it's very possible you can make good photographs by pocket camera. More and more you make photographs, you increasingly understand photography technique. So not always during learning photography, you must apply expensive camera and its accessories.

2. Consider buy tripod
Cheap tripod but competent steady should you consider, especially if your hands have tremor habit. Your photographs would more glorious if you apply timer feature or shutter release when you use tripod.

3. Bring your camera every where you go
Good moments could suddenly come every where you are, if you always bring your camera and hurry up taking the moment, nothing to loose, more than anything else when you volunteer bring tripod. If you have a camera-phone, you can take some photographs as notes of the moment you recorded by your camera.

4. Make a list moments would you record
If you can not bring your camera, at least you are carrying notebook or cellular phone to record the place you want to take the photographs. Do not forget to record important thing of photography, such as lighting etc., so you can come back there at the good time.

5. Do not overlook "normal" object in photography
You may not see anything interesting and worth photographed in the living room or backyard, but at least try to look around with a new perspective. You might be able to find the  light spectrum or some wildflowers in your backyard, it is often a simple object can create a good photograph.

6. Enjoy the process of learning photography
The most interesting thing to learn a hobby like photography, there is not enough words to learn it. A lot of inspiration could be found around you. Look at all of this using the eye of a photographer and you will find photo opportunities that you did not realize before.

7. Take advantage of a free online resource to learn photography
Learn photographs produced by professional photographers through sites such as flickr, or websites that share information on photographic techniques, where can you find inspiration and tips on photography. If you are interested in learning about post-processing and still no budget to buy software like Adobe Photoshop, try using free software like GIMP.

8. Continue to test the camera settings
Your pocket camera has a feature that can be far more flexible than you know now. Read the user guide or manual to help interpret the symbols contained in the camera settings. Try photographing a subject using different settings, see and learn, and choose which one best results you like. When to re-review the photos on the computer, look at EXIF data of each photo to see the back camera settings do you use when shooting.

9. Learn the basic rules
As we know, a lot of information about the world of photography spread over the Internet. Start reading a couple articles about the photographic composition. Be open to opinions from more experienced photographers about photography techniques they use. You certainly need to know and understand the basic rules before breaking them, don't you?

10. Take photographs routinely
Try to photograph something every day, if you can not do that, then make sure you practice on a regular basis so you do not forget what you have learned before. The best way to do this is to give yourself a photographic challenge each week.

11. Do not be afraid to experiment
If you use a digital camera, perform continuous testing and most likely you'll find something you like, and of course you will learn a lot through this learning process.

Good luck!

Monday, January 7, 2013

Tips to Change Your DSLR Lens

 
Change DSLR Lens - One benefit of having DSLR camera is the interchangeable lens. It means with only one camera body we can use many kind of lenses to develop creativity in photography. This post I inform you how to fast and save change your DSLR lens.

Sensor camera is very sensitive with dust or micro water splash. Dirt can make some noise on the photos (See photo below), so you must change your lens safely. Care your sensor camera especially if you are in outdoor activity.

Change DSLR Lens.jpg

Following the fast change DSLR lens safely:
  • Garland camera strap in your neck. Point camera to face downward.
  • Set front-cap lens will be changed correctly.
  • Rotate the lens counter clockwise while pressing lens-lock button.
  • Rotate lens until slacks, but doesn't really getting-out of camera.
  • Take lens will be attached, open cover lens back, and put it at the easy to reach place. Do this with one hand whereas the other hand holds the lens in camera.
  • Discharge lens from camera and lets camera still face downward.
  • Now attach new lens swiftly (attention to marking point, marking point camera and marking point lens must be paralleled) then turn new lens clockwise until correctly locked.
  • Attached lens-back cover at old lens and keep old lens into camera bag.

Extra tips:
Activate sensor cleaning feature in your camera to avoid or reduce your photos noised.
Avoid change your lens in the windy air and or in the beach.

Sunday, January 6, 2013

Canon 5D Mark II "Retired"

 
Canon 5D Mark II "retired" - Yes, Canon Japan has officially stopped production Canon 5D Mark II as of the date of December 24, 2012 and put it into 'Old Products List'. This marks the official end of the life of these cameras.
Canon 5D Mark II.jpg

At launching, September 2008, this camera has a simple purpose: as a successor to the Canon 5D camera. The camera is regarded as one of the most important camera Canon, because bears some tantalizing features, among others:

  • The high resolution camera with a full frame sensor cheapest in its time. With a resolution of 21 MP, Nikon D3X compared with it cost 3 times more expensive.
  • Its the first DSLR camera that has the ability to record 1080p HD video quality. Nowadays, DSLR cameras with such capabilities are common, but when it is a breakthrough.
  • Once the best-selling cameras, while Canon announces the launch of the Canon 5D Mark III as the more recent edition, 5D Mark II camera hasn't been discontinued yet, just lowered the price.
For those of you who are looking for full frame DSLR cameras, some of the cheapest way is to buy a new camera Canon 6D or Nikon D600 (other than entrance to the used camera market of course), but with an important title it bears, the Canon 5D Mark II still deserve to be considered along it still availables in the shop window.

Here are some of the reviews on this camera from famous reviewer:

1. "DP Review" (dpreview.com) gave badge "Highly Recommended to Canon 5D Mark II".
2. "Imaging Resources" (imaging-resource.com) conclude: “High quality is one thing, but being a camera that can deliver high quality over a wide range of lighting conditions and different ISO settings is what makes the Canon 5D Mark II such a compelling choice”.


Goodbye, Eos 5D Mark II!

Thursday, January 3, 2013

Important Accessories for Your DSLR Camera

 
Important Accessories for Your DSLR Camera - As increasing the experience in photography and to support your mobility, you must be thinking that you have to add some gears for your digital SLR system. There are too many choice of gears in market, but you have to choose important accessories first before you choose any other gears.

Following I inform you 7 important accessories you should have before you plan to buy another accessories:

Carrying Bag
There are several kind of bags for your satisfaction: backpack, sling-slide, waist-bag, or suitcase. If you want to carry your DSLR system and accessories completely, you should use suitcase for safety and comfort. If you want to enjoy your adventure, you should use backpack. If you plan to take city hunting or street photography for special moment such as carnival, you should use waist-bag or sling-slide. Professional photographer advise to use sling-slide bag for ease and comfort when we need to change lens or filter. The waist-bag usually too small to collect your DSLR system accessories.

Cleaning Kit
You need microfiber mop and special cleansing dilution to keep cleaning camera exterior and lenses. It's usually use blower to clean lenses, and I do not advise you to clean inside of camera. Bring your camera to the expert to clean camera interior periodically or if you need it, especially cleaning the sensor, however, the recent DSLR has been equipped with self-cleaning facility to clean the sensor.

Tripod
 

Accessories DSLR Camera 3.jpg
Tripod, monopod, or gorillapod is needed to get sharp photograph in long exposure photography. Tripod is the most popular for its reliable. You should buy strong enough tripod to support your camera and lens with telescopic feet, easy for camera installation, and has a flexible head (choose ball head tripod).

External Flash
External flash will increase your photograph quality significantly rather than with built-in flash of your camera. It is powerful, flexible, easy to control the lighting you want ti direct to.
 

Accessories DSLR Camera 1.jpg

External flash can make smooth lighting, average, and brighter than built-in flash.

Filter
Filters are essential accessories in DSLR system. There are three filters you should to consider to buy:
UV Filter (Neutral Filter) or Protection Filter - to protect your lens from dust, water splash, or your finger print.

  • Polarization Filter (CPL) - to make darker sky, remove water or mirror reflection, or make trees more green.
  • ND (Neutral Density) Filter and Grad-ND - to reduce light ti the camera. If you want to make water-fall photograph as smooth as white cotton (long aperture) in daylight, you need ND filter to reduce the light. Grad-ND used to gradual light reducing. It's good for landscape photography, because contrast of land and sky is too high.


Accessories DSLR Camera 4.jpg

Shutter Release
Another accessories to increase sharpness of photograph, after tripod, is shutter release. We do not need to press camera shutter release that can disturb camera position when we use long aperture program. Shutter release is analog with television remote control. You can choose wired or wireless shutter release.

Vertical Grip (VG)
If you more intensive in photography, especially you frequent take portrait orientation photograph, you need vertical grip (VG) for your comfort and giving you enough battery reverse.

Consider Before Buying Digital SLR Camera

 
Before Buying Digital SLR Camera - Choosing the right Digital SLR Camera is too complicated moreover there are many choices in market. By the end of year 2012 there are at least 10 camera producers around the world (Leica, Canon, Nikon, Fujifilm, Olympus, Panasonic, Pentax, Sony, Samsung, and Sigma) produced more than 40 DSLR camera types.

Here are non-technical considerations before you decide to buy DSLR camera:

If your father gave heritage lens
 

Before Buying DSLR 1.jpg
It could be the consideration, if you have heritage lens from celluloid film era. Some digital SLR cameras compatible with the lens, so bring it to the camera store to get the compatible camera you want to buy.

Your friends' camera
If your friends or your community use Canon, buy Canon. If your friends or your community use Nikon, buy Nikon. It makes you easy to interchange many kinds of lenses freely.

After sale services
You should buy the camera at the camera store where you live. It makes easy if the camera need to be serviced rather than you have to send your camera via courier. And may be the camera store can lend you the substitute camera along the service time that can take several days or weeks. It could be good comparison rather than you buy camera from main distributor far away from your home. The next comparison is how much care the producer hear their consumer complains.

Your budget
Budget is very important when you plan to buy digital SLR camera, because digital SLR system is not just camera body and lens. The system needs some accessories, such as software photo editing, computer, tripod, filter, flash, carrying bag, reserve battery, etc.. You should make priority scale of digital SLR system planning according to your budget. Advice from senior photographer: it is better you have qualified lens rather than having good cameras with bad lens.

Your seriousness
 

Before Buying DSLR Camera 2.jpg
Ask to yourself, how serious you want to enter photography world. Professional photographers will need special lenses and accessories. Flash for macro or 600mm lens, for instance, Nikon and Canon should be the producers to be considered. On the contrary, if you use the photography word just for your hobby, the ten producers mentioned above will be the consideration. Where is your position now?